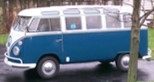
1963 Single Cab - A.K.A. Sanford
-
Karl Kombi
- Posts: 296
- Joined: Wed Sep 27, 2017 9:56 am
- Contact:
Re: 1963 Single Cab - A.K.A. Sanford
Nice job - look at all those clean wires and shiny connectors! 

Re: 1963 Single Cab - A.K.A. Sanford
It's Marla with an " L"
(My list of assets is just too long...)
(My list of assets is just too long...)

Re: 1963 Single Cab - A.K.A. Sanford
I'm pretty impressed Marla was able to complete this by herself, very few owners would be able to install a harness and make things work correctly.
Great job!
Great job!
Last edited by Dual Port on Wed Aug 27, 2025 9:09 am, edited 1 time in total.
Bruce Amacker
'66 Deluxe Bus
'65 Standard Bus
'66 Deluxe Bus
'65 Standard Bus
Re: 1963 Single Cab - A.K.A. Sanford
Thanks Bruce! Now I’m considering doing Gunther. That will be a project for next spring though.
It's Marla with an " L"
(My list of assets is just too long...)
(My list of assets is just too long...)

Re: 1963 Single Cab - A.K.A. Sanford
Looks great Marla! Did the Wolfsburg West harness come with all the connectors?
1967 Beetle "Little Tud"
1968 Black Double Cab "The Black Pearl"
1970 Lotus White Single Cab "Big Tud"
1976 Sage Green Westfalia "Sweet Pickle"
They gotta' have names!
1968 Black Double Cab "The Black Pearl"
1970 Lotus White Single Cab "Big Tud"
1976 Sage Green Westfalia "Sweet Pickle"
They gotta' have names!
Re: 1963 Single Cab - A.K.A. Sanford
I did some detail work on Marla's single cab I'll document here:
1. Install battery, redrill holddown clamp to accommodate wider battery. Remove and clean ground strap at connection to body. Remove clamp bolt- ends of clamp are touching, use cutoff wheel to remove material to make clamp function correctly. Clean bolt and redrill bolt hole in clamp. Chase threads in body with tap, install new bolt and flat washer. Check ground strap at trans, appears clean and tight. Check voltage drop while cranking between battery negative and engine case, within spec at .25v.
2. Indicator Light Issues- both oil light and generator light inop. Test circuits to find them complete. Remove light bulbs to find them LED normal polarity, circuit is reverse polarity and a single polarity LED bulb will not function. (VW wires this circuit reverse- bulb base is positive, bulb tip is negative) Install new regular bulbs and warning lights work correctly. Check charging voltage, 14.5vdc/2000rpm is normal.
3. Turn signal indicator works with key off, but not with key on. Load test power and ground circuits in dash to 9 amps-OK. Check 4way relay to find it marked as 6V, install standard 12v Bosch 5 pin relay in its place. Test flasher unit to find it intermittent, replace with ’68-70 Beetle flasher relay and install ground wire on flasher. Indicator light on dash needs ground input rather than power input to work correctly, remove black power wire at top center of speedo and tape off. Install ground wire at this terminal to complete circuit, indicator now works correctly with both turn signals and 4ways. Install Phillips head screws on speedo head and most dash switches as they are much easier to remove and install. Mount both relays to dash. Correct power feed causing slow drain to battery.
4. Test wiring to wiper motor- good. Wiper motor is faulty.
5. Test fuel gauge circuit- good. Fuel sender resistance reading is infinity meaning sender is faulty. Fuel gauge sweeps full range when wire is grounded, meaning gauge circuit is good. Fuel gauge is marked 6v, meaning a 162 ohm resistor on the power input will be needed to make the gauge work accurately (as accurately as they can be). Correct gauge ground problem by grinding the rear of dash where the gauge mounts.
6. Dome light inop- remove dome light and bead blast housing to clean terminals, lube switch and install with new screws and LED bulbs. (bulbs are polarity sensitive and won’t work if installed backwards). Test dome light draw to be .17ADC.
7. Install power port under dash for powering accessories powered from fuse 2.
8. Install red fuses at location 1 and 2 in fuse block. Remove tiewraps securing fuseblack and use modified fender washer to secure fuseblock to dash.
9. Road test-OK. Turn signal lever does not cancel correctly. Brake pedal feels soft like adjustment is needed. Lube driver’s door gaskets with silicone to make door operate easier- needs hinges adjusted and weatherstrip installed.
- Attachments
-
- The ground strap on the tranny was clean and tight and tested fine under load.
-
- The 4way relay was marked 6v so I installed a standard 12v 5 pin Bosch relay in its place.
-
- I wasn't happy with the Napa flasher which seemed to work funky so I installed a '68-70 Beetle flasher in its place which uses an external ground and has proven to be more reliable than an American can style.
-
- This is how I did the voltage drop test on the ground side. I know it doesn't include the starter to case connection, but it does include the ground strap and 99% of the circuit. It read .25v under load which is within the spec of .5v.
-
- This is a common area to have a poor connection. I'm not a fan of the "star washer" setup, which is what this had, which reduces contact surface area. I cleaned the surfaces well with a cookie pad, chased the threads with a tap, and used a new bolt and flat washer. Testing with this setup has proven to me in the past to have the least voltage drop.
-
- The ends of the clamp were touching, so I removed material with a whizzer wheel so the clamp would work correctly.
-
- These are the bulbs Marla bought from the same source that provided her with LEDs for her camper. Unfortunately, they sent polarity sensitive bulbs that won't work in a VW warning light system which is wired in reverse polarity- the bulb socket is hot and the tip is ground. I installed regular bulbs and the dummy lights work fine. LED stands for Light Emitting Diode, and a diode is a one-way electrical check valve. Normal bulbs don't care if the polarity is reversed but LEDs do, unless they have an internal shunt built in. Some LEDs will work in a backwards wired system if they have an internal shunt.
Bruce Amacker
'66 Deluxe Bus
'65 Standard Bus
'66 Deluxe Bus
'65 Standard Bus
Re: 1963 Single Cab - A.K.A. Sanford
I don't know why some of the pics are posting inverted, so live with it.
- Attachments
-
- PP showing circuit voltage.
-
- This is an old school tool I've used for many decades. It's a squirrel cage fan blower I use to test amperage capability of circuits- it draws about 9 amps when open and 5-6 amps when closed. Checking voltage is great but doesn't tell you if a circuit can support a load. This does.
-
- One of my favorite tools when doing electrical diagnostics, a Power Probe. It not only gives you the voltage of what you're probing, it tells you whether it's hot or ground, and also allows you to inject power or ground into a circuit. Very cool tool if you understand electricity but a WMD if you don't.
-
- Let there be light!
-
- I removed and bead blasted the dome light housing, lubed the switch, installed LED bulbs and mounted it with new screws. These LEDs are also polarity sensitive, so if you reverse them they do not light. They draw .17a which is more than I thought they would. It would be fine to forget them overnight but math shows they would take over 500 hours to run the battery dead.
-
- I installed a power port under the dash so she can charge her cell phone while driving, I always do this when changing a harness or doing major electrical work.
Bruce Amacker
'66 Deluxe Bus
'65 Standard Bus
'66 Deluxe Bus
'65 Standard Bus
Who is online
Users browsing this forum: No registered users and 0 guests